<article itemscope itemtype="https://schema.org/BlogPosting"> <meta itemprop="headline" content="7 Essential Watercolour Techniques Every Beginner Should Master in 2026"> <meta itemprop="description" content="Complete guide to basic watercolour painting techniques for beginners in Sutton, Carshalton, and South London. Learn wet-on-wet, dry brush, glazing, and more with step-by-step instructions."> <meta itemprop="datePublished" content="2026-03-09"> <meta itemprop="dateModified" content="2026-03-09"> <meta itemprop="author" content="Simon Robin Stephens"> <meta itemprop="image" content="https://www.simonrobinstephensart.com/static/workshops/artwork-example-landscape.webp">
<div class="max-w-4xl mx-auto px-4 py-12">
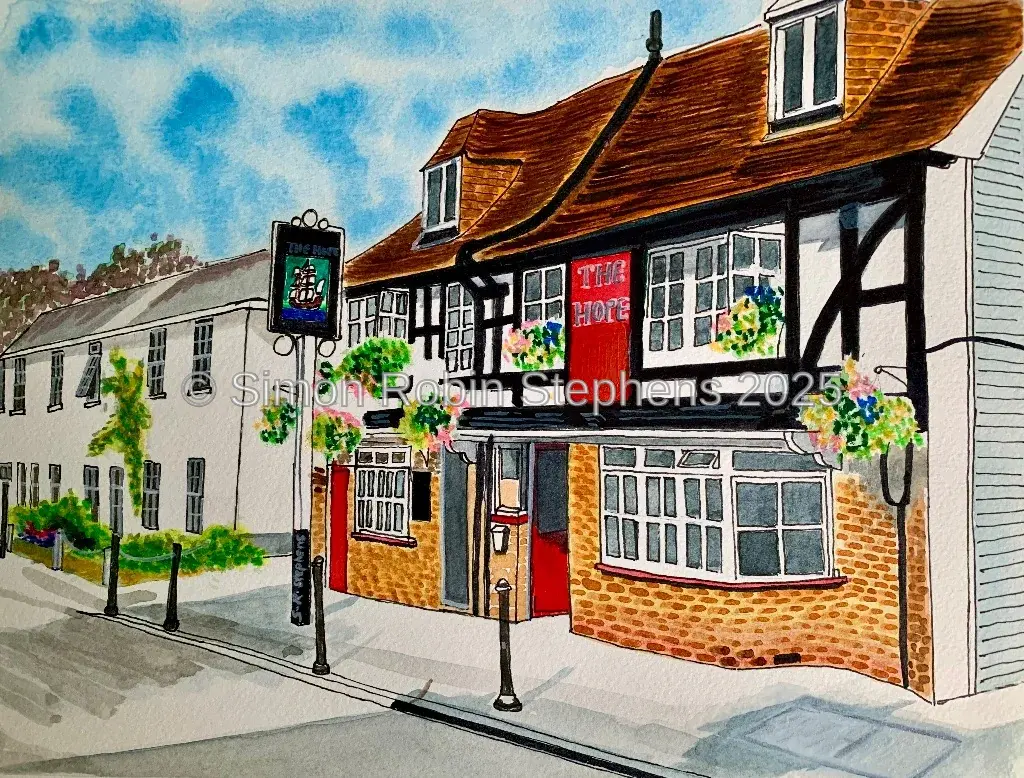
<!-- Hero Image --> <div class="mb-8 rounded-lg overflow-hidden shadow-xl"> <img src="/static/workshops/artwork-example-landscape.webp" alt="Beautiful watercolour landscape painting created using beginner techniques" class="w-full h-auto" width="1200" height="675" /> </div>
<!-- Introduction --> <div class="prose prose-lg max-w-none">
<h1 class="text-4xl md:text-5xl font-bold text-gray-900 mb-6"> 7 Essential Watercolour Techniques Every Beginner Should Master in 2026 </h1>
<p class="text-xl text-gray-600 mb-8 leading-relaxed"> Starting your <strong>watercolour painting journey</strong> can feel overwhelming. With so many techniques, brushes, and methods to learn, where do you even begin? After teaching <strong>hundreds of beginners</strong> in my <a href="/workshops" class="text-teal-600 hover:text-teal-700 font-semibold">watercolour workshops across South London</a> (Carshalton, Sutton, Cheam, Wallington, Epsom, and surrounding areas), I've identified the <strong>7 fundamental techniques</strong> that will transform your painting from amateur to stunning – and they're easier than you think. </p>
<p class="mb-6"> Whether you're picking up a brush for the first time or looking to refine your skills, mastering these <strong>basic watercolour techniques</strong> will give you the confidence to create beautiful artwork. Best of all, you don't need expensive equipment – just water, paint, paper, and a willingness to experiment. </p>
<!-- Local Workshop Promotion Box --> <div class="my-8 bg-gradient-to-r from-teal-500 to-teal-600 rounded-lg p-6 text-white shadow-xl"> <h3 class="text-2xl font-bold mb-3">🎨 Join Our Beginner-Friendly Workshops in South London</h3> <p class="mb-4"> Learn these techniques hands-on in relaxed, small-group sessions at <strong>The Salvation Army, Carshalton</strong>. Perfect for complete beginners from <strong>Sutton, Cheam, Wallington, Epsom, Belmont, Banstead, Croydon, Hackbridge, and all South London areas</strong>. Easy to reach by bus or car, with free parking available. </p> <ul class="mb-4 space-y-1 text-white/90"> <li>✓ All professional materials provided</li> <li>✓ Maximum 12 students for personal attention</li> <li>✓ Tea, coffee & biscuits included</li> <li>✓ Take home your finished paintings</li> <li>✓ Beginner-friendly, supportive atmosphere</li> </ul> <a href="/workshops" class="inline-block bg-white text-teal-600 px-8 py-3 rounded-lg font-bold hover:bg-gray-100 transition shadow-lg" >
View Workshop Dates & Book Your Place →
</a> </div>
<!-- Table of Contents --> <div class="bg-teal-50 border-l-4 border-teal-600 p-6 mb-8"> <h2 class="text-2xl font-bold text-gray-900 mb-4">What You'll Learn:</h2> <ul class="space-y-2"> <li>✓ <a href="#wet-on-wet" class="text-teal-700 hover:underline">Wet-on-Wet Technique</a> – Creating soft, dreamy backgrounds</li> <li>✓ <a href="#wet-on-dry" class="text-teal-700 hover:underline">Wet-on-Dry Method</a> – Precise details and sharp edges</li> <li>✓ <a href="#glazing" class="text-teal-700 hover:underline">Glazing & Layering</a> – Building depth and luminosity</li> <li>✓ <a href="#dry-brush" class="text-teal-700 hover:underline">Dry Brush Technique</a> – Adding texture and interest</li> <li>✓ <a href="#lifting" class="text-teal-700 hover:underline">Lifting Paint</a> – Creating highlights and correcting mistakes</li> <li>✓ <a href="#colour-mixing" class="text-teal-700 hover:underline">Colour Mixing Basics</a> – Achieving perfect hues every time</li> <li>✓ <a href="#water-control" class="text-teal-700 hover:underline">Water Control</a> – The most important skill of all</li> </ul> </div>
<!-- Technique 1: Wet-on-Wet --> <h2 id="wet-on-wet" class="text-3xl font-bold text-gray-900 mt-12 mb-4">
- Wet-on-Wet: The Foundation of Beautiful Watercolours
</h2>
<p class="mb-4"> The <strong>wet-on-wet technique</strong> is where most beginners fall in love with watercolour. This method involves applying wet paint onto wet paper or wet paint, creating those gorgeous, soft, dreamy effects that watercolour is famous for. </p>
<h3 class="text-2xl font-semibold text-gray-800 mt-6 mb-3">How to Do It:</h3> <ol class="list-decimal list-inside space-y-2 mb-6 pl-4"> <li><strong>Prepare your paper</strong> – Wet the entire area with clean water using a large brush</li> <li><strong>Test the shine</strong> – The paper should be damp but not pooling with water</li> <li><strong>Add your paint</strong> – Touch your brush loaded with pigment to the wet surface</li> <li><strong>Watch the magic</strong> – The paint will spread and blend naturally</li> <li><strong>Tilt to guide</strong> – Gently tilt your paper to direct the flow</li> </ol>
<div class="bg-blue-50 border-l-4 border-blue-600 p-4 mb-6"> <p class="text-sm font-semibold text-blue-900 mb-2">💡 Pro Tip from My South London Workshops:</p> <p class="text-sm text-blue-800"> Timing is everything! If the paper is too wet, your paint will spread uncontrollably. Too dry, and you won't get that soft blend. Practice on scrap paper first. In my <a href="/workshops" class="text-blue-700 underline">beginner watercolour classes in Carshalton</a>, I teach a simple "shine test" that works every time. </p> </div>
<p class="mb-6"> <strong>Best for:</strong> Skies, backgrounds, soft florals, atmospheric landscapes, abstract art </p>
<!-- Technique 2: Wet-on-Dry --> <h2 id="wet-on-dry" class="text-3xl font-bold text-gray-900 mt-12 mb-4">
- Wet-on-Dry: Precision and Control
</h2>
<p class="mb-4"> While wet-on-wet creates soft effects, <strong>wet-on-dry</strong> gives you precision and control. This is your go-to technique for adding <strong>details, sharp edges, and defined shapes</strong> to your paintings. </p>
<h3 class="text-2xl font-semibold text-gray-800 mt-6 mb-3">How to Do It:</h3> <ol class="list-decimal list-inside space-y-2 mb-6 pl-4"> <li><strong>Ensure paper is dry</strong> – Wait for previous layers to completely dry</li> <li><strong>Load your brush</strong> – Use concentrated paint with less water</li> <li><strong>Paint with confidence</strong> – Apply smooth, controlled strokes</li> <li><strong>Let it dry naturally</strong> – Don't disturb the paint as it sets</li> </ol>
<p class="mb-6"> <strong>Best for:</strong> Tree trunks, building details, foreground elements, text, borders, fine lines </p>
<!-- Technique 3: Glazing --> <h2 id="glazing" class="text-3xl font-bold text-gray-900 mt-12 mb-4">
- Glazing: The Secret to Luminous Watercolours
</h2>
<p class="mb-4"> <strong>Glazing</strong> is the technique of applying thin, transparent layers of watercolour one over another to create depth, richness, and that magical <strong>glowing quality</strong> that professional watercolours have. </p>
<h3 class="text-2xl font-semibold text-gray-800 mt-6 mb-3">The Glazing Method:</h3> <ol class="list-decimal list-inside space-y-2 mb-6 pl-4"> <li><strong>Paint your first layer</strong> – Use diluted paint, very transparent</li> <li><strong>Let it dry completely</strong> – This is crucial! Any dampness will lift the previous layer</li> <li><strong>Apply second layer</strong> – Use a different colour or the same colour for intensity</li> <li><strong>Build gradually</strong> – Each layer adds depth and complexity</li> <li><strong>Stop when satisfied</strong> – Usually 2-4 layers is enough</li> </ol>
<div class="bg-purple-50 border-l-4 border-purple-600 p-4 mb-6"> <p class="text-sm font-semibold text-purple-900 mb-2">🎨 Workshop Success Story:</p> <p class="text-sm text-purple-800"> "I never understood how watercolours got that glowing quality until Simon showed me glazing in his workshop.
Now all my paintings have depth!" - Sarah from Sutton,
<a href="/workshops" class="text-purple-700 underline">February 2026 Carshalton workshop</a>. </p> </div>
<p class="mb-6"> <strong>Best for:</strong> Creating depth in landscapes, painting realistic skin tones, building rich colours, adding shadows, creating the illusion of light </p>
<!-- Technique 4: Dry Brush --> <h2 id="dry-brush" class="text-3xl font-bold text-gray-900 mt-12 mb-4">
- Dry Brush: Adding Texture and Character
</h2>
<p class="mb-4"> The <strong>dry brush technique</strong> uses very little water and creates rough, textured marks that are perfect for adding interest and realism to your paintings. </p>
<h3 class="text-2xl font-semibold text-gray-800 mt-6 mb-3">Dry Brush Steps:</h3> <ol class="list-decimal list-inside space-y-2 mb-6 pl-4"> <li><strong>Load brush with thick paint</strong> – Use minimal water, almost paste-like consistency</li> <li><strong>Remove excess moisture</strong> – Dab your brush on a paper towel</li> <li><strong>Drag across paper</strong> – Use the side of the brush for best effect</li> <li><strong>Apply light pressure</strong> – The paper texture should show through</li> </ol>
<p class="mb-6"> <strong>Best for:</strong> Tree bark, grass, rough water, old weathered buildings, animal fur, rocks </p>
<!-- Technique 5: Lifting --> <h2 id="lifting" class="text-3xl font-bold text-gray-900 mt-12 mb-4">
- Lifting Paint: Your Eraser for Watercolours
</h2>
<p class="mb-4"> One of the <strong>most useful techniques for beginners</strong> – lifting paint allows you to create highlights, correct mistakes, and add dimension to your work. </p>
<h3 class="text-2xl font-semibold text-gray-800 mt-6 mb-3">How to Lift Paint:</h3> <ul class="list-disc list-inside space-y-2 mb-6 pl-4"> <li><strong>While still wet</strong> – Use a clean, damp brush or paper towel to blot</li> <li><strong>When dry</strong> – Rewet the area, wait 30 seconds, then lift with a clean brush</li> <li><strong>For hard edges</strong> – Use a damp cotton swab for precision</li> <li><strong>For soft effects</strong> – Use a damp sponge for larger areas</li> </ul>
<p class="mb-6"> <strong>Best for:</strong> Clouds, light reflections on water, correcting mistakes, creating highlights, softening edges </p>
<!-- Technique 6: Colour Mixing --> <h2 id="colour-mixing" class="text-3xl font-bold text-gray-900 mt-12 mb-4">
- Colour Mixing: The Heart of Watercolour Mastery
</h2>
<p class="mb-4"> Understanding <strong>how to mix watercolour paint</strong> properly is essential. Unlike other mediums, watercolours behave differently when wet vs. dry, and mixing on paper creates different effects than mixing on your palette. </p>
<h3 class="text-2xl font-semibold text-gray-800 mt-6 mb-3">Essential Colour Mixing Rules:</h3> <div class="bg-amber-50 border-2 border-amber-400 rounded-lg p-6 mb-6"> <ul class="space-y-3"> <li class="flex items-start"> <span class="text-2xl mr-3">🎨</span> <span><strong>Start with primaries:</strong> Red, blue, yellow can make almost any colour</span> </li> <li class="flex items-start"> <span class="text-2xl mr-3">💧</span> <span><strong>Water ratio matters:</strong> More water = lighter colours, less water = more intense</span> </li> <li class="flex items-start"> <span class="text-2xl mr-3">⏱️</span> <span><strong>Test first:</strong> Colours look lighter when dry (usually 30% lighter!)</span> </li> <li class="flex items-start"> <span class="text-2xl mr-3">🎯</span> <span><strong>Don't overmix:</strong> A little variation creates more interesting colours</span> </li> <li class="flex items-start"> <span class="text-2xl mr-3">🌈</span> <span><strong>Complementary colours:</strong> Red+Green, Blue+Orange, Yellow+Purple make great neutrals</span> </li> </ul> </div>
<!-- Technique 7: Water Control --> <h2 id="water-control" class="text-3xl font-bold text-gray-900 mt-12 mb-4">
- Water Control: The Master Skill
</h2>
<p class="mb-4"> Here's the truth: <strong>watercolour is 90% water control and 10% paint</strong>. This is the single most important skill you'll learn, and it's what separates beginners from confident painters. </p>
<h3 class="text-2xl font-semibold text-gray-800 mt-6 mb-3">Understanding Water Ratios:</h3> <div class="grid md:grid-cols-3 gap-4 mb-6"> <div class="bg-blue-50 p-4 rounded-lg"> <h4 class="font-bold text-blue-900 mb-2">Lots of Water (90%)</h4> <p class="text-sm text-blue-800">Very pale, transparent washes. Great for skies and distant elements.</p> </div> <div class="bg-blue-100 p-4 rounded-lg"> <h4 class="font-bold text-blue-900 mb-2">Medium Water (50%)</h4> <p class="text-sm text-blue-800">Standard painting consistency. Most versatile ratio for general painting.</p> </div> <div class="bg-blue-200 p-4 rounded-lg"> <h4 class="font-bold text-blue-900 mb-2">Minimal Water (10%)</h4> <p class="text-sm text-blue-800">Thick, concentrated colour. Perfect for dark details and final touches.</p> </div> </div>
<h3 class="text-2xl font-semibold text-gray-800 mt-6 mb-3">Signs of Water Problems:</h3> <ul class="space-y-2 mb-6"> <li>❌ <strong>Too much water:</strong> Paint spreads everywhere, hard edges, blooms (cauliflower effects)</li> <li>❌ <strong>Too little water:</strong> Paint doesn't flow, rough texture, hard to blend</li> <li>✅ <strong>Just right:</strong> Paint flows smoothly, blends beautifully, dries evenly</li> </ul>
<!-- Final Workshop CTA with Local Areas --> <div class="my-12 bg-gradient-to-br from-teal-50 to-blue-50 rounded-2xl p-8 border-2 border-teal-200"> <h3 class="text-3xl font-bold text-gray-900 mb-4">Ready to Practice These Techniques?</h3> <p class="text-gray-700 mb-4"> Reading about watercolour techniques is great, but <strong>nothing beats hands-on practice</strong> with an experienced artist guiding you. Join me at <strong>The Salvation Army in Carshalton</strong> for relaxed, beginner-friendly workshops. </p>
<div class="bg-white rounded-lg p-6 mb-6"> <h4 class="font-bold text-gray-900 mb-3">🚗 Easy to Reach From:</h4> <div class="grid md:grid-cols-2 gap-3 text-gray-700"> <ul class="space-y-1"> <li>✓ <strong>Sutton</strong> - 10 min drive</li> <li>✓ <strong>Cheam</strong> - 8 min drive</li> <li>✓ <strong>Wallington</strong> - 5 min drive</li> <li>✓ <strong>Carshalton</strong> - Walking distance</li> <li>✓ <strong>Hackbridge</strong> - 7 min drive</li> </ul> <ul class="space-y-1"> <li>✓ <strong>Epsom</strong> - 15 min drive</li> <li>✓ <strong>Belmont</strong> - 12 min drive</li> <li>✓ <strong>Banstead</strong> - 18 min drive</li> <li>✓ <strong>Croydon</strong> - 20 min drive</li> <li>✓ <strong>All South London areas</strong></li> </ul> </div> <p class="text-sm text-gray-600 mt-3"> <i class="fas fa-bus mr-1"></i> <strong>By bus:</strong> Excellent bus links from all areas. <i class="fas fa-parking ml-3 mr-1"></i> <strong>Free parking</strong> available on site. </p> </div>
<p class="text-gray-700 mb-4"> <strong>What's Included in Every Workshop:</strong> </p> <ul class="space-y-2 mb-6 text-gray-700"> <li>✓ All professional watercolour materials provided</li> <li>✓ Personal guidance throughout your session</li> <li>✓ Maximum 12 students for individual attention</li> <li>✓ Tea, coffee & biscuits included</li> <li>✓ Relaxed, supportive atmosphere</li> <li>✓ Take home your finished paintings</li> <li>✓ Learn all 7 techniques hands-on</li> </ul> <a href="/workshops" class="inline-block bg-teal-600 text-white px-8 py-4 rounded-lg font-bold text-lg hover:bg-teal-700 transition shadow-lg" >
View Workshop Dates & Book Your Place
</a> <p class="text-sm text-gray-600 mt-3"> <i class="fas fa-map-marker-alt mr-1"></i> The Salvation Army, Carshalton • Small groups • All levels welcome • Easy parking </p> </div>
<!-- Practical Tips Section --> <h2 class="text-3xl font-bold text-gray-900 mt-12 mb-4">
Practical Tips for Practicing at Home
</h2>
<p class="mb-6"> Want to practice these <strong>watercolour techniques</strong> between workshops? Here are my top recommendations: </p>
<h3 class="text-2xl font-semibold text-gray-800 mt-6 mb-3">What You Need to Get Started:</h3> <div class="bg-gray-50 rounded-lg p-6 mb-6"> <h4 class="font-bold text-gray-900 mb-4">Essential Supplies (£30-50):</h4> <ul class="space-y-2 text-gray-700"> <li>• <strong>Paint:</strong> Winsor & Newton Cotman set (12 colours) or similar student grade</li> <li>• <strong>Brushes:</strong> 3 round brushes (sizes 4, 8, 12) – synthetic is fine for beginners</li> <li>• <strong>Paper:</strong> 300gsm cold-pressed watercolour paper (A4 pad, minimum 140lb)</li> <li>• <strong>Palette:</strong> Any white ceramic plate works perfectly</li> <li>• <strong>Water:</strong> Two jars (one for cleaning, one for mixing)</li> <li>• <strong>Paper towels:</strong> For lifting and cleaning brushes</li> </ul> </div>
<h3 class="text-2xl font-semibold text-gray-800 mt-6 mb-3">Practice Exercises:</h3> <ol class="list-decimal list-inside space-y-3 mb-6 pl-4"> <li> <strong>Water Ratio Swatches</strong> – Paint the same colour with different water amounts. This single exercise will teach you more about water control than anything else. </li> <li> <strong>Wet-on-Wet Skies</strong> – Practice painting simple gradient skies. Try blue fading to white, or sunset colours blending together. </li> <li> <strong>Simple Shapes</strong> – Paint basic shapes (circles, squares, leaves) using wet-on-dry. Focus on clean edges. </li> <li> <strong>Glazing Practice</strong> – Paint a square, let it dry, paint another square overlapping. See how colours interact. </li> <li> <strong>Daily 10-Minute Studies</strong> – Pick one object (apple, flower, mug) and paint it quickly. Speed forces you to be decisive. </li> </ol>
<div class="bg-green-50 border-l-4 border-green-600 p-4 mb-6"> <p class="text-sm font-semibold text-green-900 mb-2">🌱 Beginner Mindset:</p> <p class="text-sm text-green-800"> Don't aim for perfection! Your first 20 paintings will probably be "meh" – and that's completely normal. Every watercolour artist has a drawer full of early attempts. The key is to keep painting and <a href="/workshops" class="text-green-700 underline">learn from experienced artists in our Carshalton workshops</a> who can show you what you're doing right (and wrong). </p> </div>
<!-- Common Mistakes Section --> <h2 class="text-3xl font-bold text-gray-900 mt-12 mb-4">
Common Beginner Mistakes (And How to Avoid Them)
</h2>
<div class="space-y-6 mb-8"> <div class="border-l-4 border-red-500 pl-4"> <h3 class="text-xl font-bold text-gray-900 mb-2">1. Using Too Much Water</h3> <p class="text-gray-700"> <strong>Problem:</strong> Your painting looks washed out and pale.<br> <strong>Solution:</strong> Start with less water than you think. You can always add more, but you can't take it away. </p> </div>
<div class="border-l-4 border-red-500 pl-4"> <h3 class="text-xl font-bold text-gray-900 mb-2">2. Painting on Cheap Paper</h3> <p class="text-gray-700"> <strong>Problem:</strong> Paper warps, paint behaves unpredictably, colours look muddy.<br> <strong>Solution:</strong> Invest in 300gsm (140lb) watercolour paper. It makes a HUGE difference. </p> </div>
<div class="border-l-4 border-red-500 pl-4"> <h3 class="text-xl font-bold text-gray-900 mb-2">3. Not Letting Layers Dry</h3> <p class="text-gray-700"> <strong>Problem:</strong> Previous layers lift up, colours mix when they shouldn't, muddy results.<br> <strong>Solution:</strong> Use a hairdryer on cool setting, or simply be patient. Dry means completely dry! </p> </div>
<div class="border-l-4 border-red-500 pl-4"> <h3 class="text-xl font-bold text-gray-900 mb-2">4. Overworking the Paint</h3> <p class="text-gray-700"> <strong>Problem:</strong> Going over the same area repeatedly, causing the paper to pill and colours to get muddy.<br> <strong>Solution:</strong> Watercolour loves confidence. Make your mark and leave it alone. </p> </div>
<div class="border-l-4 border-red-500 pl-4"> <h3 class="text-xl font-bold text-gray-900 mb-2">5. Dirty Water</h3> <p class="text-gray-700"> <strong>Problem:</strong> All your colours turn muddy brown.<br> <strong>Solution:</strong> Change your water frequently! Keep two jars – one for cleaning, one for mixing. </p> </div> </div>
<!-- Conclusion --> <h2 class="text-3xl font-bold text-gray-900 mt-12 mb-4">
Your Watercolour Journey Starts Here
</h2>
<p class="mb-6"> Mastering these <strong>7 essential watercolour techniques</strong> is your foundation for creating beautiful artwork. Remember, every professional artist started exactly where you are now – as a complete beginner wondering how watercolour even works. </p>
<p class="mb-6"> The secret isn't talent – it's <strong>consistent practice</strong> and learning from experienced artists who can guide you past the common pitfalls. That's why I created my beginner-friendly workshops here in South London, to give you a supportive space to learn, experiment, and grow as an artist. </p>
<p class="mb-6"> Whether you practice at home or join us for hands-on learning in <strong>Carshalton</strong> (easy to reach from Sutton, Cheam, Wallington, Epsom, Belmont, Banstead, Croydon, Hackbridge, and all South London areas), the most important thing is to <strong>start painting today</strong>. </p>
<div class="bg-teal-50 rounded-lg p-6 text-center mb-8"> <p class="text-lg text-gray-800 mb-4">
<strong>Ready to take your watercolour skills to the next level?</strong>
</p> <a href="/workshops" class="inline-block bg-teal-600 text-white px-8 py-4 rounded-lg font-bold text-lg hover:bg-teal-700 transition shadow-lg" >
Book Your Workshop Place Today
</a> <p class="text-sm text-gray-600 mt-4">
Small groups • Beginner-friendly • All materials provided • Free parking<br>
<strong>The Salvation Army, Carshalton</strong> • Easy access from all South London areas </p> </div>
<p class="text-gray-600 text-sm mb-8"> <em>Questions about workshops or watercolour techniques? <a href="/contact" class="text-teal-600 hover:underline">Get in touch</a> – I'm always happy to help fellow artists on their creative journey.</em> </p>
</div> </div> </article>